How to Use Live Streaming on VMOS Cloud?
A Brief Introduction about Live Features on VMOSCloud
The Live feature in the VMOS Cloud provides a kind of low-cost, high-efficiency and scalable automated live streaming solution, which includes Camera streaming and Unmanned live streaming (aka. Pre-recorded live streaming). It’s particularly suitable for scenarios that require 7x24-hour continuous vodcast such as TikTok Shop, Amazon Live, or go-to marketing globally without any geographical restrictions.
VMOS Cloud supports users to use the LIVE feature on web, pc and android, you can scroll to the related part for reading the guide.
What Kind of LIVE STREAMING Mode Can You Use on VMOSCloud?
Now VMOS Cloud Provides two types of modes to support live streaming, here we use the web version for example to introduce this function.
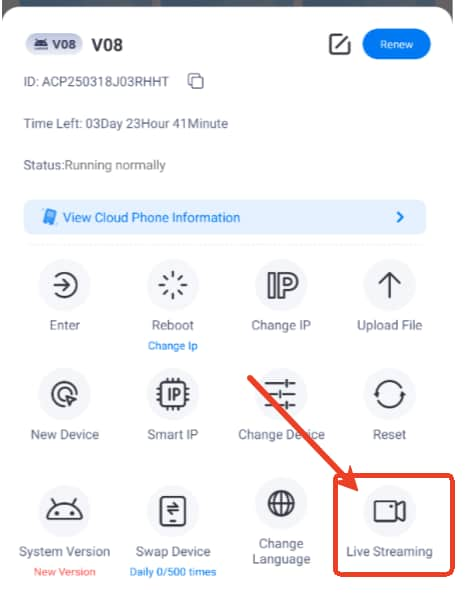
Step 1. Run any cloud phone-> find the LIVE iconon the right side bar in the device.

Option 1- Real-time streaming
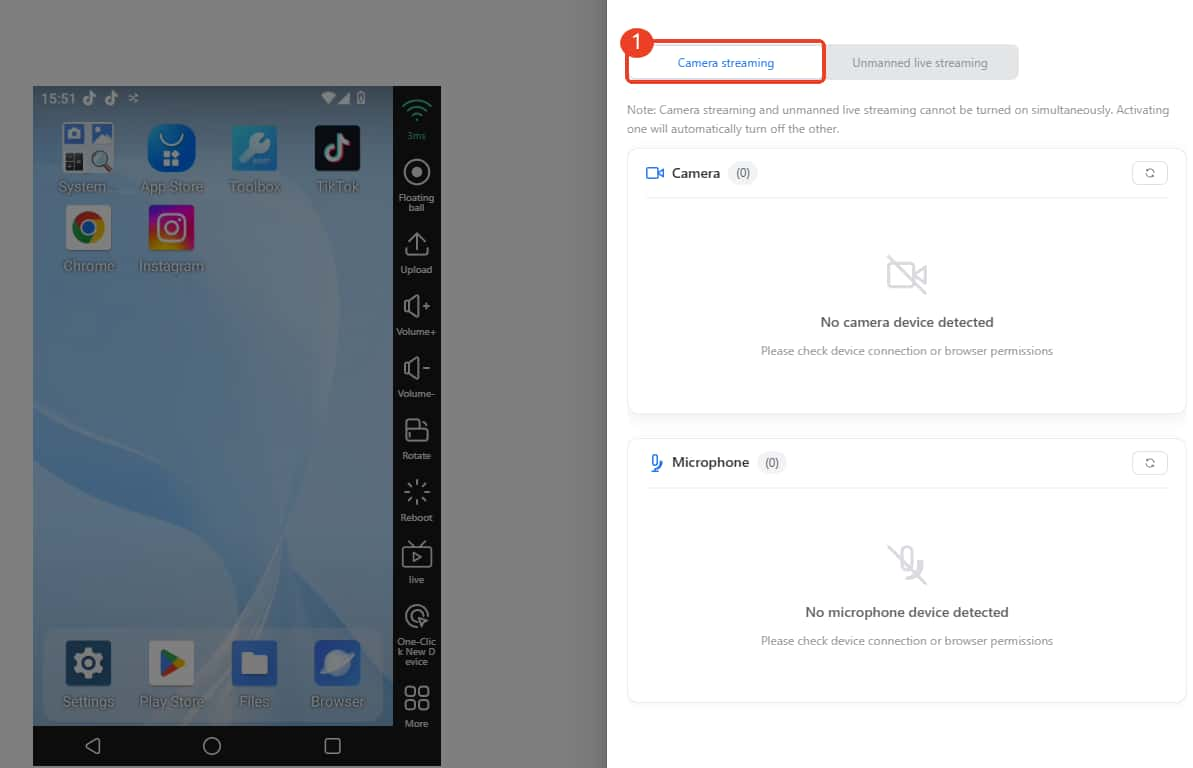
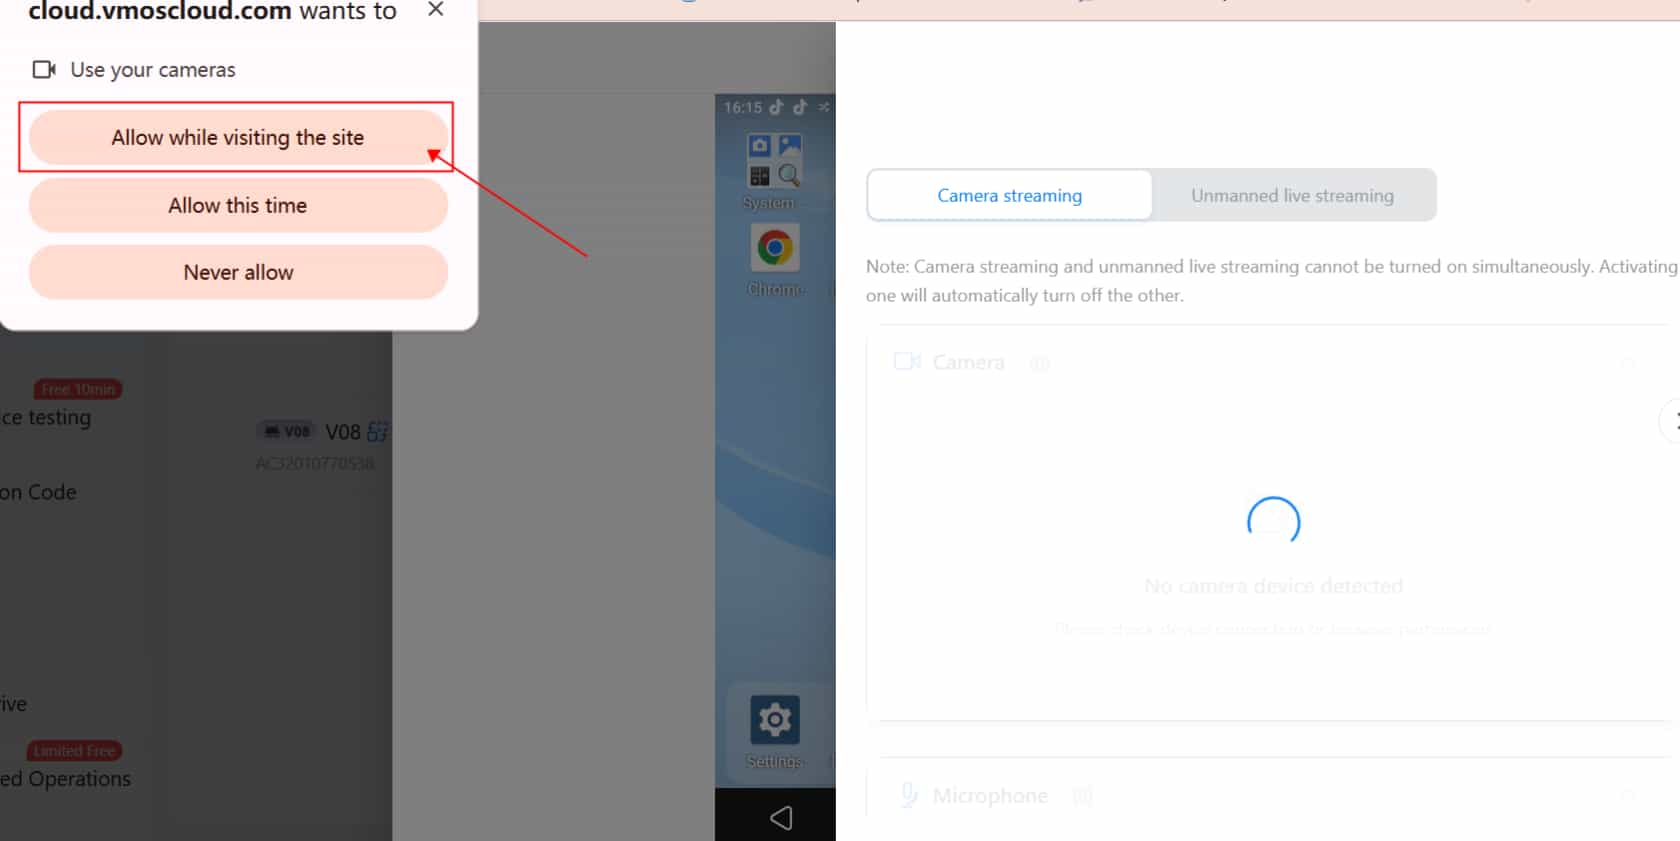
Step 2. If you want to have a real-time live stream, then select ->the Camera Streaming to start with (first pic shows the situation that didn’t detect the microphone and camera). Kindly note this kind of streaming requires accessing your Camera device and Microphone device, please make sure you allow these settings on the pop-up windows as follows (pic 2).
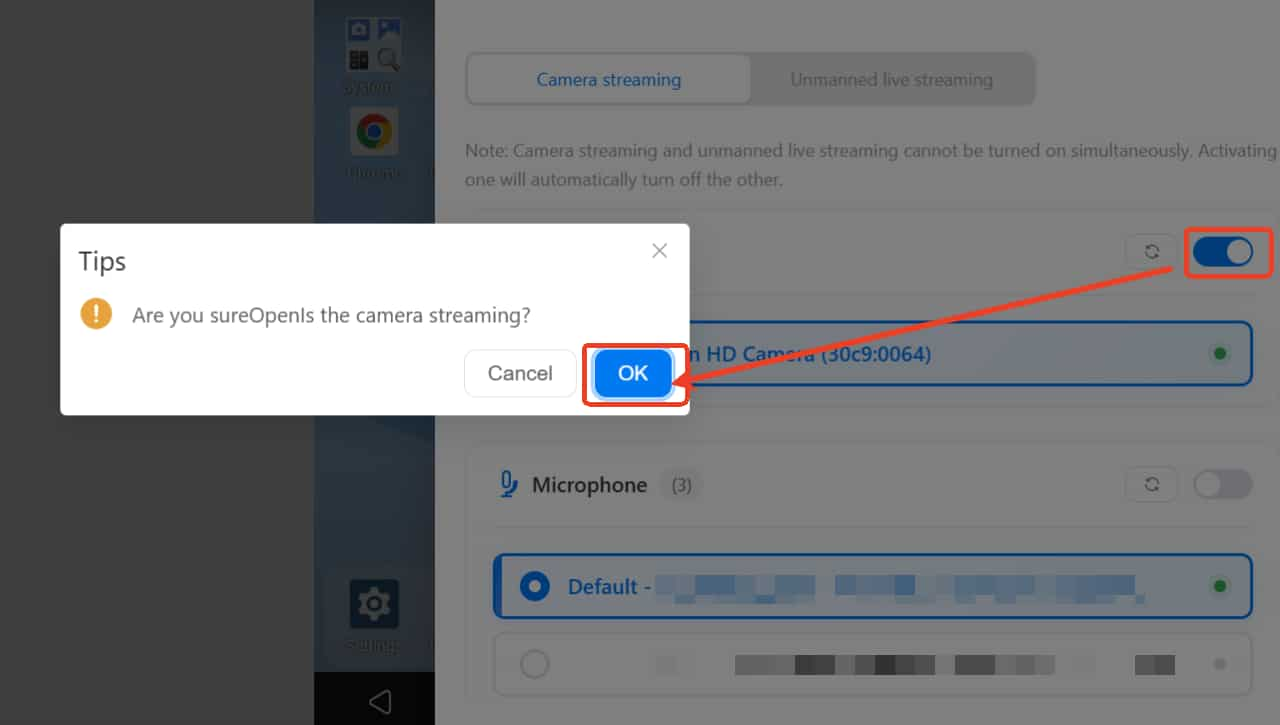
Step 3. The panel will read the related settings you have, and choose one of the Camera type and Microphone type you need, -> Right slide the button -> Click OK to open it, after that you can start the real-time live streaming.
Option 2- Unmanned streaming (Pre-Recorded LIVE)
Step 2. If you prefer a way to stream pre-recorded videos as 'LIVE' , then select LIVE->Unmanned Streaming would be more suitable for you.
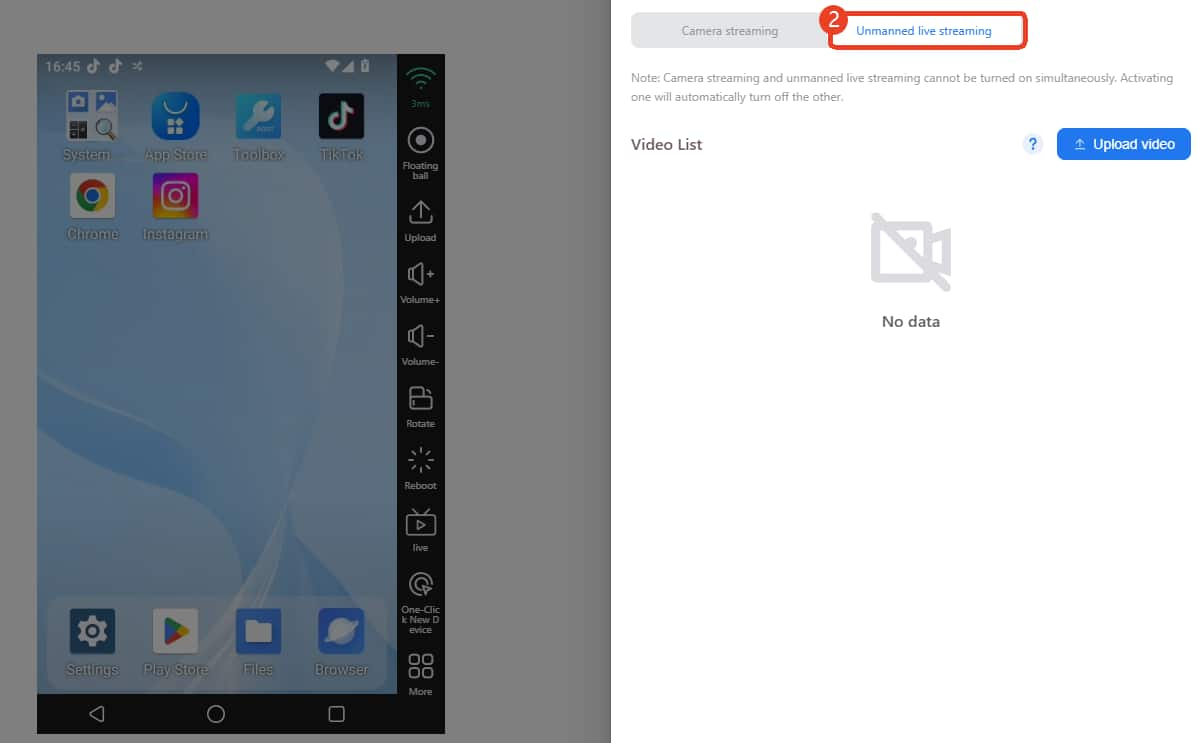
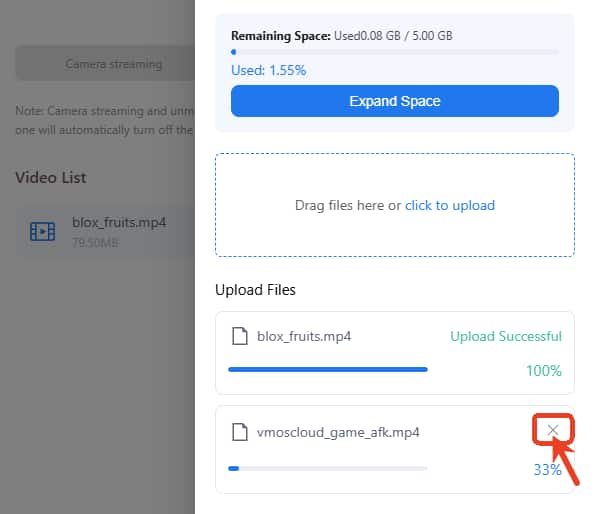
Step 3. This kind of streaming does not ask your microphone and camera permission, click ->Upload Video to add the files that you record in advance. We list the video file requirements for your reference:
Every single video file size should be lower than 2GB.
Type: mp4 first and resolution under 1080p.
Now only support 5 video files at one time to upload.
If you want to cancel the upload, please click the X icon to delete.
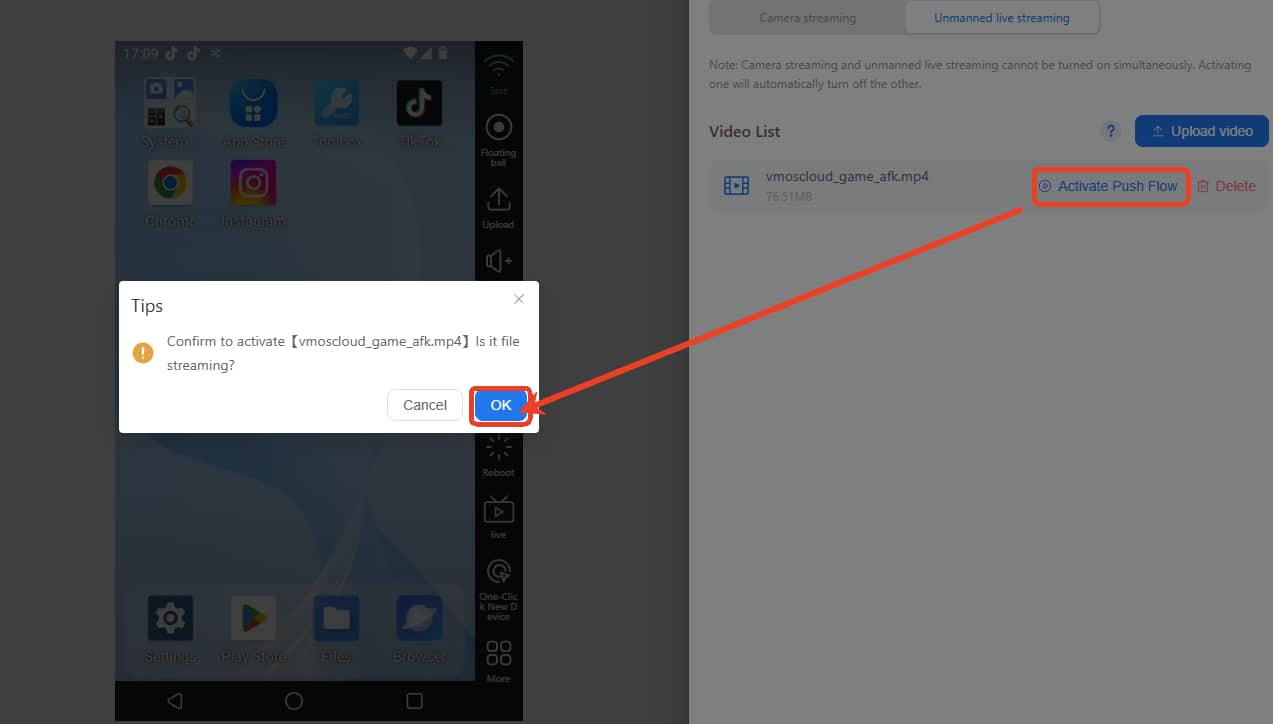
Step 4. Then click the Activate Push Flow-> OK to start the pre-record live streaming. It very suits AI live-streamers to automatically explain products, and can cover audiences in different areas for 7x24 hours.
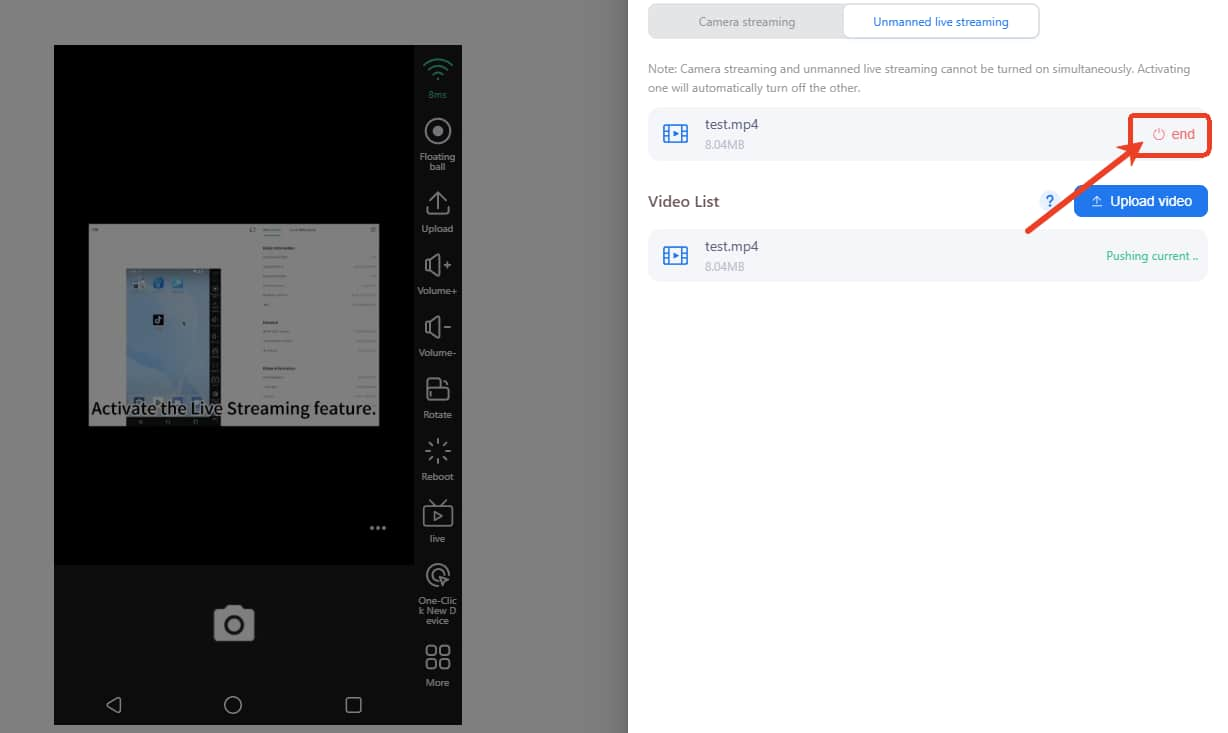
Step 5. After that, it will show the ->Pushing Current, which means your video is already on waiting status. Now you can open the application you want to live stream, we take the Camera App here for example, open it then you can see your pre-record video starts working.
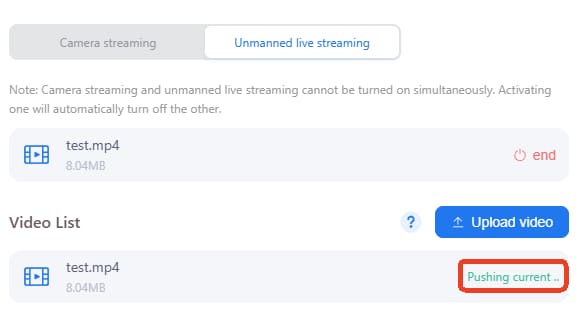
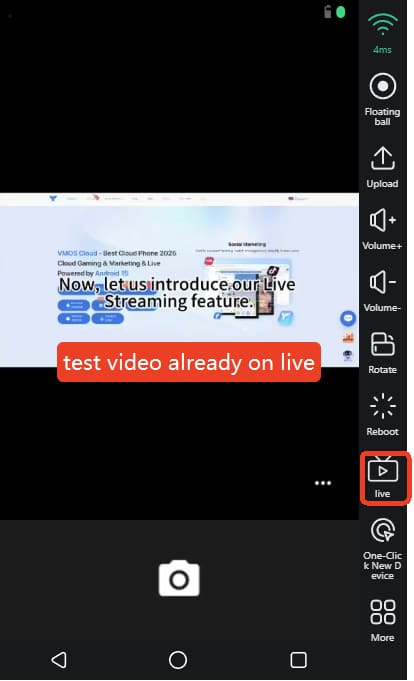
Step 6. Usually under the unmanned mode, the live streaming will keep recycling your recorded video. Click the ->End if you want to close it.
How to Open the Live Features on VMOSCloud Android?
The function keeps the same on the android version, if you’re the android users, you can follow these simple steps to open the LIVE feature on VMOS Cloud.
Tap the ->Settings icon on the cloud phone machine.
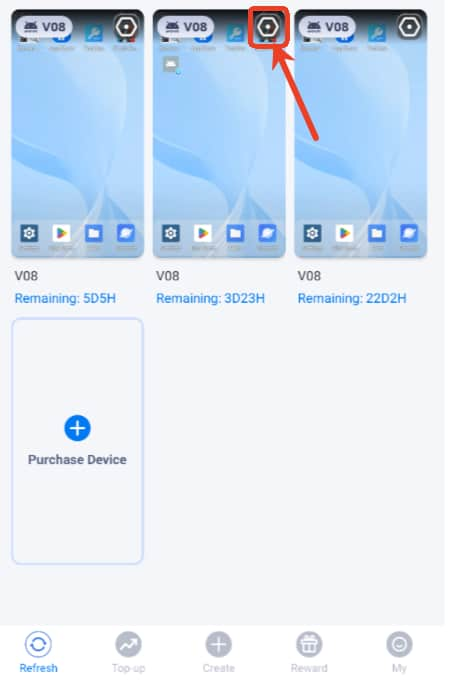
Find the -> Live Streaming icon on the corner of the right side to open it and then open the cloud phone machine to use it.
